It’s a well-known fact that lead generation represents one of the most important components of any (online) business. Once you’ve generated those leads you need to warm them up and get them to opt-in to your emails or to your lead magnet.
In this post, you’ll learn how to increase opt-in rate and drive more traffic to your website.
What’s the difference between leads and opted in leads?
Leads are potential customers. Opted in leads are people who’ve come to your site and signed up to receive more information from you.
One of the best ways to attract potential customers is with a lead magnet – a free item or service like an ebook, video series or checklist, which people get for free if they engage with your site.
People who get a copy of your lead magnet are statistically more likely to buy from you than visitors who only see an offer on your website or blog.
What opt-in strategies can you use to get as many people as possible to sign up for your lead magnet? Let’s take a look.
Strategies to increase opt-in rate
The opt-in rate represents the percentage of people who register for your email list out of those who come to your website.
Before you get started with optimizing your opt-in rate, you need to calculate your current rate. Here’s how:

When it comes to opt-in rates, most people have between 0.5% and 1%. A good opt-in rate is 2% and an excellent one is 5% or more.
Whatever yours is, you can increase it by using the tactics below.
Step 1 – Improve your lead magnet
If people aren’t opting in for your lead, it could be that the copy, design or message of the page just isn’t resonating with your potential clients.
Example 1
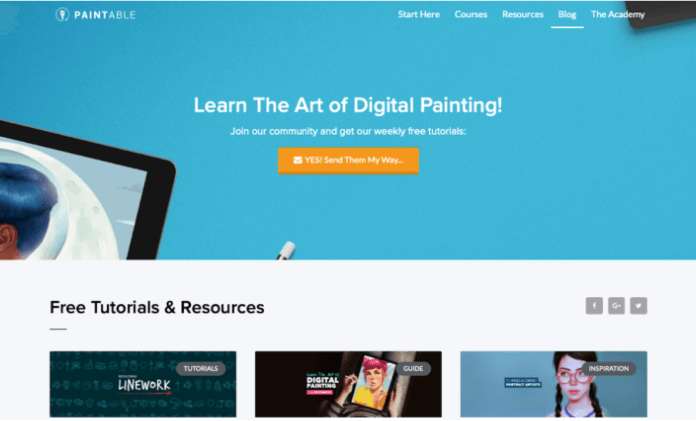
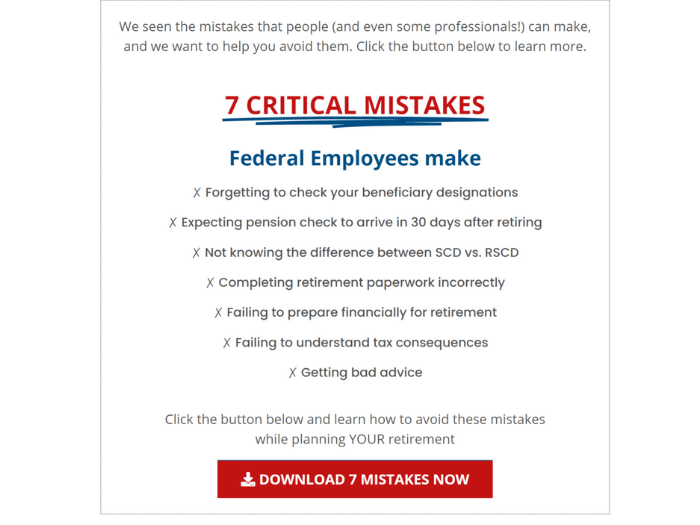
Let’s look at an example. Our client Paintable’s lead magnet was a set of free tutorials. It was already advertised on their homepage, but we wanted to make the lead magnet more visible. It needed to show its benefits more clearly.
This is how the homepage lead magnet looked before we started working on it:
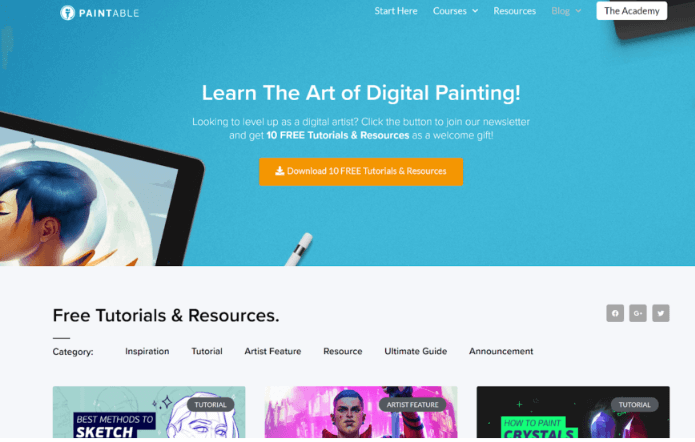
We changed the wording above the fold to give people more information about the free material. We also worked on strengthening the wording of the offer – adding “10 FREE Tutorials & Resources” instead of just “free resources”.
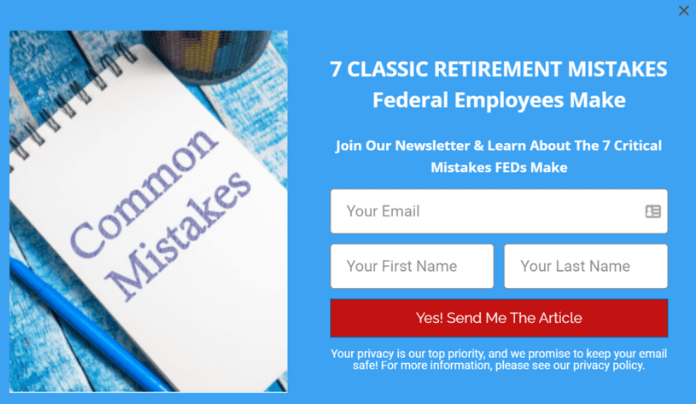
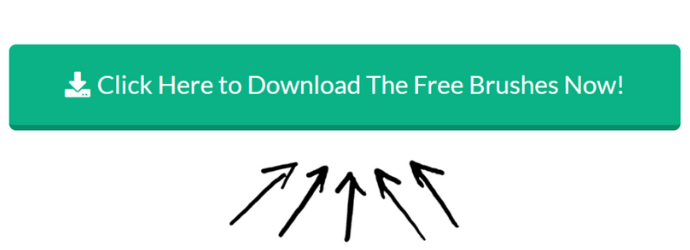
Now, once someone clicks on the Call to Action button, they see this pop-up:
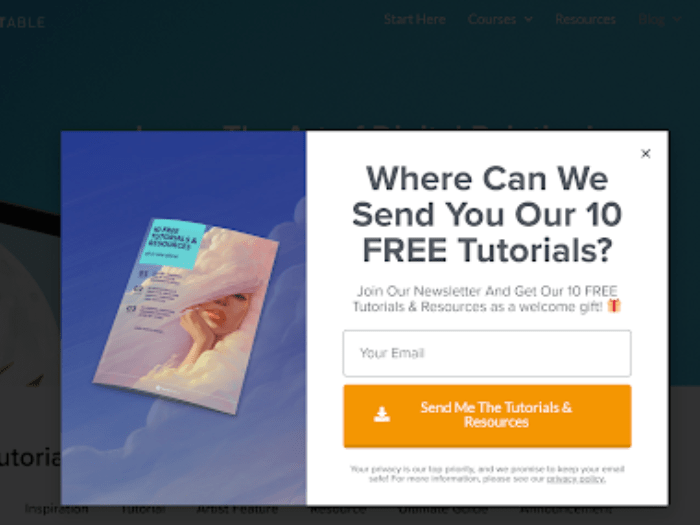
A pop-up works extremely well in terms of increasing the opt-in rate. Instead of taking people to a new page, you just add a pop-up with a form where they can leave their email address and download the free resource you have for them.
The pop-up has precise & crucial information for someone interested in digital painting. No more – no less.
Also, it is important to remember that the wording needs to follow data protection rules known as GDPR. The law says that you can’t offer people a free gift in exchange for their email address, and then automatically subscribe them to the newsletter. But, you can say that people who sign up for the newsletter will be sent a free resource.
With these tweaks to how the opt-in page looked, we managed to help them go from a 3.49% opt-in, to more than 9.3%.
Example 2
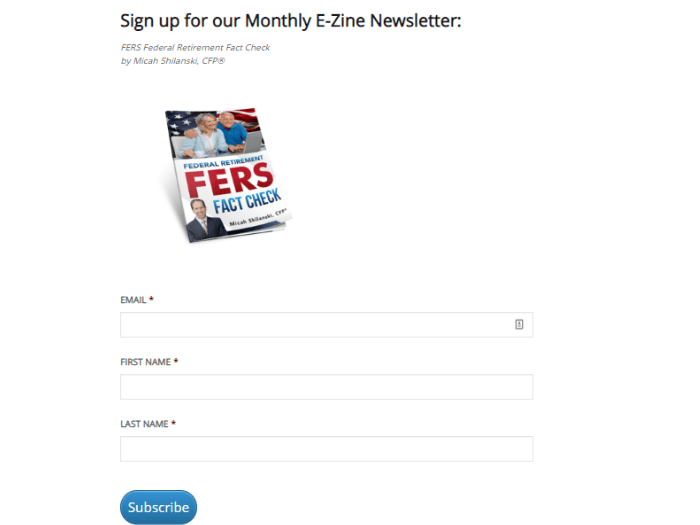
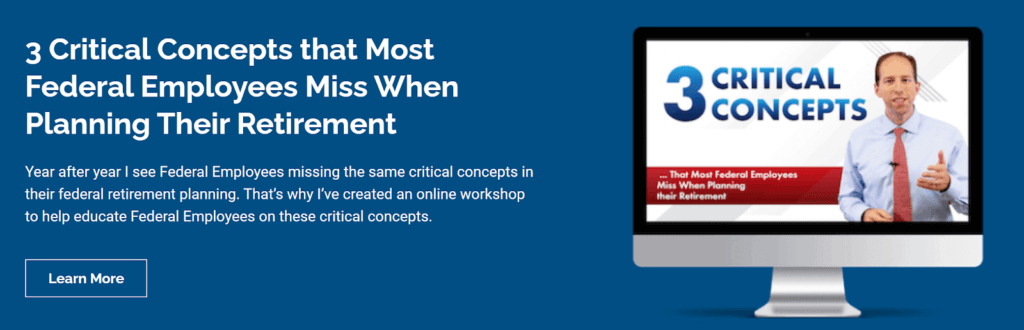
We did the same thing for another client, Plan Your Federal Retirement.
Here is what the lead magnet looked like before:
We changed it to a CTA button & banners:
Once clicked – it opens a pop-up:
We’ve also created a sitewide pop-up with a 30 seconds delay showing just enough relevant information for the audience. So now when people see the lead magnet, they know exactly what they’re signing up for.

Step 2 – Get in front of more people
Paintable already had more than 100 blog posts on its website. Adding lead magnets to all of them would be a long, time-consuming process, so we made a list of the most popular ones.
If you want to check which posts on your blog people read the most, you can do that using Google Analytics.
Here is how to do it. Open your Google Analytics account.

Click on the “Behaviour” page.
You will see a dropdown where you need to click on the “Site Content”.
Open “All pages”.
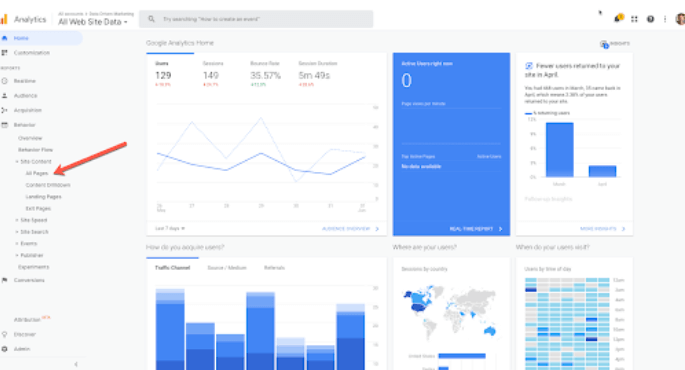
What you see below is your content over a particular period.
Change the date period so that you can see a longer period, preferably one or two years back.
You may need to filter it to show only blog content. How easy that is depends on your URL structure.
With luck, you can just go to the box marked with the red arrow on the picture below and write “/blog”, and that will allow you to see only the blog posts that you have on your website.
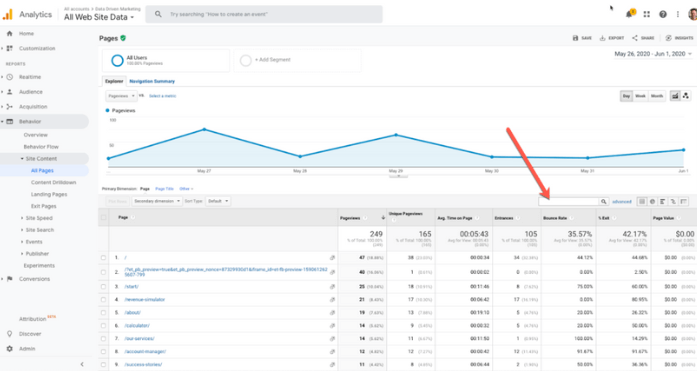
You can put them in order depending on the number of page views so it’s easier to make the list of the most popular blog posts.
Once you do that, use some 80/20 analysis. It’s like that the 20 most popular blog posts will have 80% of traffic. Start adding the lead magnet to them. Over time, you can work on lead magnet optimization for the rest of the list as well.
For Paintable we added two different pop-ups, inline buttons, and sections in three different versions across all the blog posts.
Here is one of the buttons we used:
It is a nice, clear call to action and it doesn’t take people to a different page once they click on the button. It brings up the pop-up that I showed you earlier.
Here is an example of an inline section we used:

We tried several different options and this one performed the best. It is a visual overview of what clients can get once they download the resource. The information about the material is clear. So is the call to action button. And again, it also brings up a pop-up instead of taking people to a new page.
The crucial thing about this is that the inline section is added within the blog post.
So when people are going through the page, and reading the blog post, they see the section with the lead magnet. It’s in the middle of the page. It gets people’s attention. Everyone sees it.
If the blog post is long, you can add two or three of those throughout the whole page.
Here’s another inline section we used:

It’s a different version of the same lead magnet which means you can use them together on different posts. Having various versions makes it more likely that people will sign up. You’re getting it in front of people’s eyes in slightly different ways.
For the other client, Plan Your Federal Retirement, we added a header banner to the blog posts pages. Here is how it looks:

People who clicked on the “SIGN UP NOW” button were taken to the pop-up I showed you above.
Apart from that, we also added a form at the bottom of some pages where it made sense:
So we used a number of different methods to get people to opt-in for the same thing.
Step 3 – minimize distractions
Remove links and CTAs that are not relevant
On our clients’ website, there were lots of things that could distract potential clients, like an invitation to check the YouTube page or information about other products.
That’s all great to have on the website, but it gives people too many options and they will most likely end up not doing the thing you want.
Have just one CTA per page
You want your customers to take a particular action like an email opt-in.
So get them to do one thing at a time. There is a saying “A confused customer never buys” and it’s true. If you have just one call to action, you can direct your customers to do the one thing you want most.
It’s fine to repeat the call to action multiple times on a page. In fact, it can be good. But don’t have more than one CTA.
Track your opt-in results to analyze your performance
Tracking your opt-in performance is important.
We recommend tracking your main KPIs on a weekly and monthly basis.
This is what our weekly Lead Magnet KPI Tracking Spreadsheet looks like:
You can see an increase in Lead Magnet Conversion Rate % through the weeks.
Next steps after you increase your opt-ins
Once we increase opt-in rate for our clients, we then start working on building and implementing the webinar funnel and tripwire funnel.
I hope that this blog post helped you understand how you can increase your opt-in rate with a few simple hacks.
The key is to find the lead magnet that will attract customers, make it appealing, and put it in front of people so that they don’t miss it while visiting your website.
If you don’t have time to work on this by yourself or you feel like you need someone to guide you through this process, contact us.